Let the Bridge dry for 12 hours prior to use. Estimate make and use measurements in a STEM project.

All About Everything Bridges Toothpick Bridge Design Woodworking Projects Plans Model Trains
View more on it here.
. It is no wonder that the response has been positive because it is not an easy assignment and my first page told step-by-step how I went about solving the problem. Start to sketch out your. One toothpick-length from each bridge should match the length of the bridge pieces parallel to them.
Put the toothpicks over the pencil marks on the wax paper and glue them. Any kind of toothpicks will do I got mine from walmart. Place the toothpicks on the floor.
You will not need a lot of materials and they are all super cheap and easy to find. Toothpick Bridge Step 1. Tape two pieces of graph paper together.
The continually subdivided reinforcement pieces divide the weight more evenly and that allows for a more stable bridge. Spread wax paper over the sketch and trace out the drawing on the wax paper. Repeat for the other side of the beams.
For each vertex place the skinny end of one toothpick on top of the fat end. And though I have thought much about it I have not attempted to build one yet. By Kimmy - February 25 2022 0 1 each other with toothpick pieces an extra length apart.
Connect the beams by placing a toothpick at the very end of the long beam and diagonally lean it onto the short beam and glue it in place using a couple drops of glue. They need to be glued. The first 4 steps are to create a template for design.
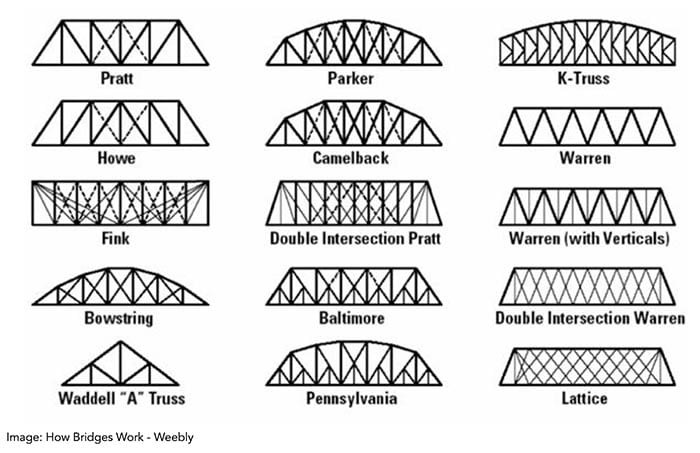
First thing you would have to do is figure out which bridge design you want to go with for the main part. Manage time and resources in a STEM project. Step-by-Step Instructions Sketch the model of your bridge on the graph paper.
Each project is an exercise in patience and determination that should never be taken lightly. The template provided in the last page is optional. Identify the components of a bridge system members joints.
Many people come to GarrettsBridges looking for advice on building a toothpick bridge. If youre thinking of building a toothpick bridge for the first time there are. My teacher made it a requirement.
Table of contents how many toothpicks do you need to make a bridge. Repeat for the other two beams -- your other 225 cm 34 foot and 30 cm 1 foot piece. If you only use a single toothpick for each support beam it wont.
Generate ideas and design solutions to solve a problem using sketches drawings and notes. Build a Support Structure. Since introducing a page for this endeavor I have seen emails and questions from all over the world.
Put a drop of glue on both the ends of one 1 toothpick. Here is a father whos son made a toothpick bridge. This page will introduce the pages about toothpick bridge construction.
Grab 3 sheets of the Template line them up as shown and use the tape to stick them together. Toothpick Bridge Project Step 1. How To Make A Toothpick Bridge Step By Step.
He discusses how to design and build a toothpick bridge and also has good photos. Building toothpick bridges can be a challenging but rewarding endeavor. If possible you should construct an underhang for your bridge.
Sketch the bridge on to the paper with the pencil. Its recommended to give a square foundation to your model because. A light sprinkle of water should dry the bridge for 12 hours.
Fill the bridge with toothpicks between the two parts. Also make sure to use a group of toothpicks stuck togeteher. You can create your own template with different shapes if you like.
Glue the third and fourth toothpick at the vertex to complete the square. Make sure toothpicks are between the two parts of the bridge so that they wont be too wet. There are many possible designs for a bridge but this kind of bridge is one of the most sturdy.
Place two more toothpicks in the glue at the tip of the first toothpick. Your bridge should be symmetrical as this will result in the best possible weight distribution and lessen the stress placed on any particular joint. This will help to alleviate many of the compression forces during the testing period.
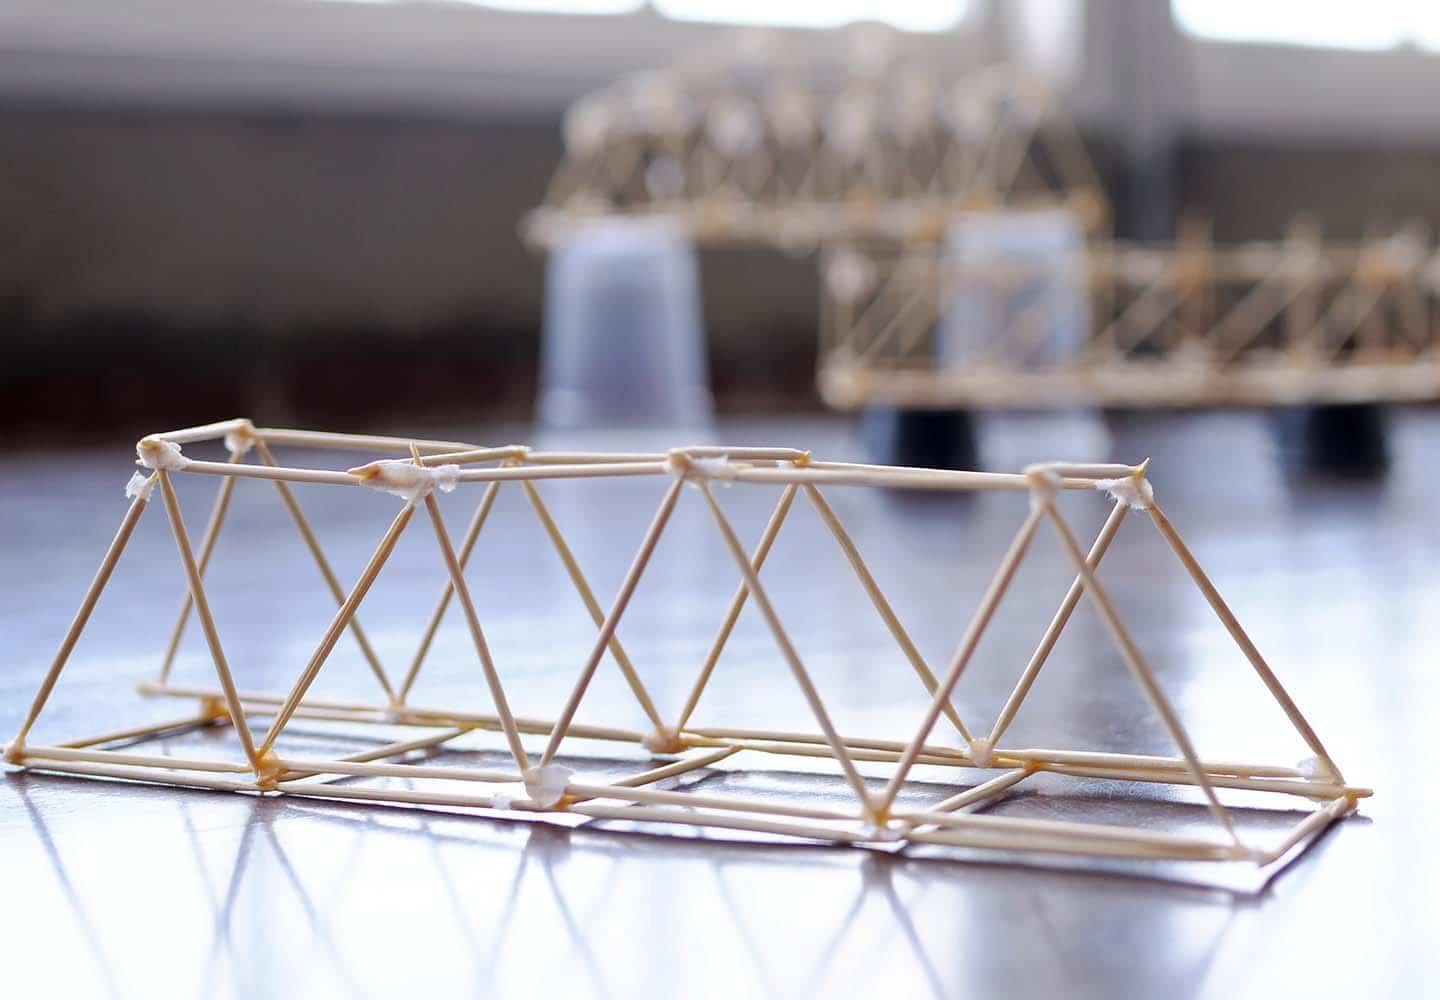
Constructing the Sides of the Bridge. You should be left with a long trapezoidal shape.
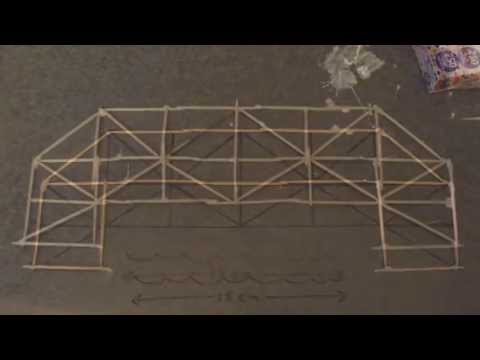
Building A Toothpick Bridge Youtube
Toothpick Bridge Career Girls
How To Build A Toothpick Bridge Science Project Ideas
Toothpick Bridge Career Girls

What S The Key To Building A Strong Toothpick Bridge Quora

Toothpick Bridge Project 7 Steps Instructables

Toothpick Bridge 10 Steps With Pictures Instructables

Dr Zoon Toothpick Bridges Youtube
0 comments
Post a Comment